Transferring ESIM From Android to iPhone: A Step-by-Step Guide for Seamless Digital Roaming
Transferring ESIM From Android to iPhone: A Step-by-Step Guide for Seamless Digital Roaming
The shift from physical SIM cards to eSIM technology marks a transformative leap in mobile connectivity—but what happens when users transition from Android devices to iPhones? ESIM (Embedded SIM) brings powerful flexibility, yet migrating this digital identity isn’t always intuitive. This comprehensive guide breaks down the essential steps, technical nuances, and practical tips for transferring eSIM configurations from Android phones to iPhones, ensuring uninterrupted roaming and connectivity.
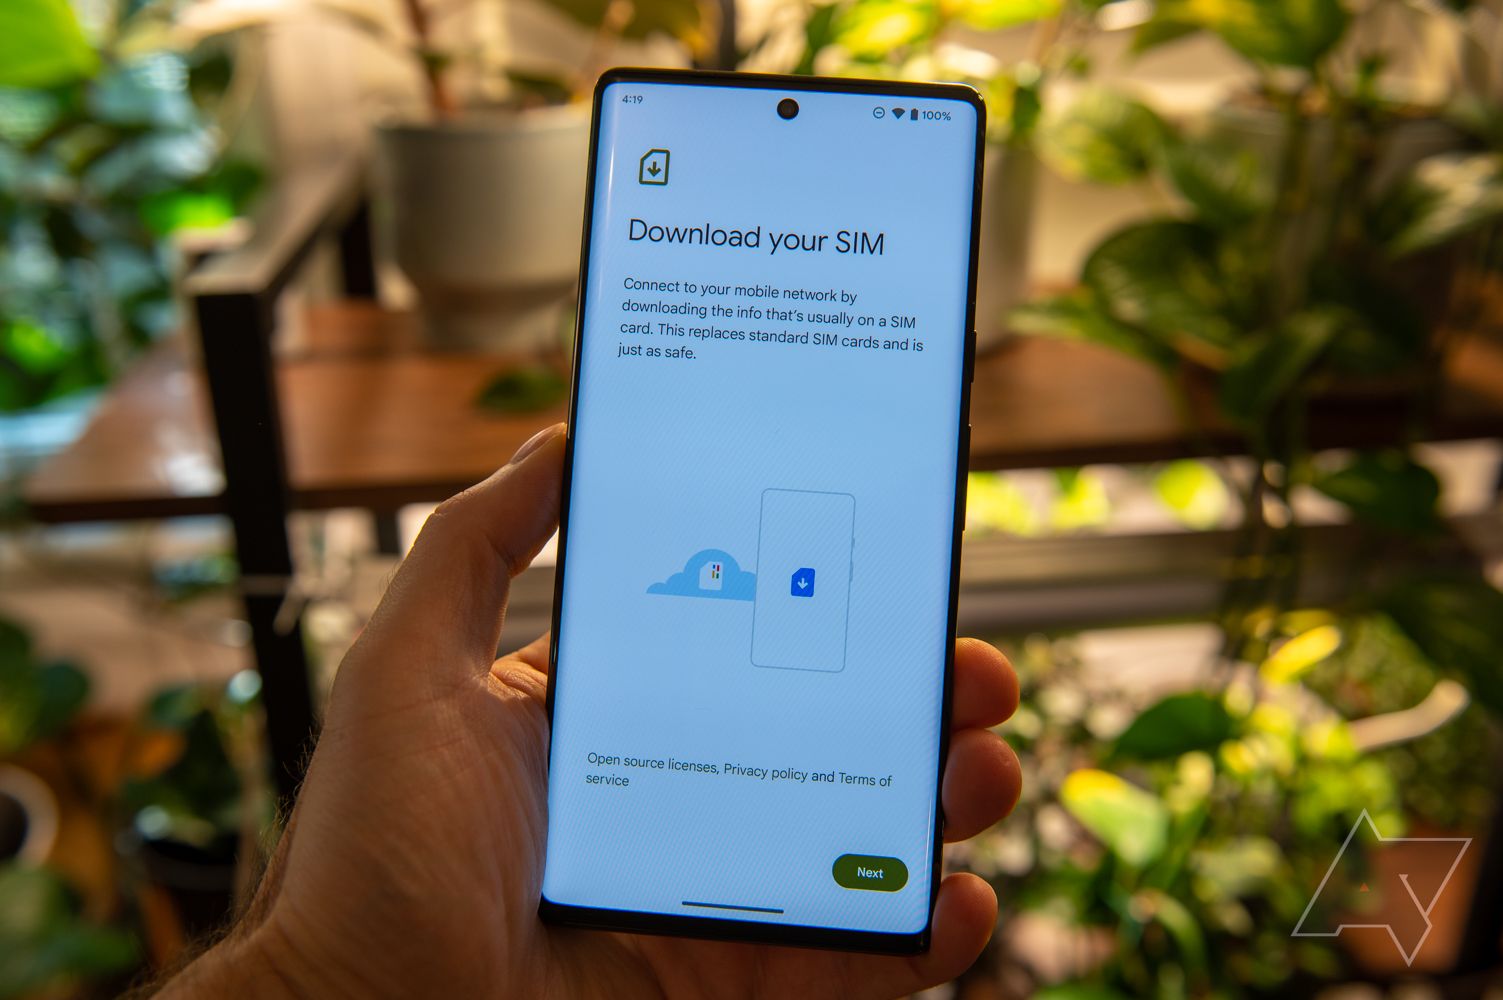
Unlike traditional SIM cards, eSIMs are integrated directly into a device’s hardware, eliminating the need for physical inserts and enabling remote provisioning. For Android users accustomed to swapping SIMs or enabling digital profiles manually, transferring an eSIM to an iPhone can seem complex—but with the right approach, it’s efficiently achievable. Understanding the underlying architecture of eSIM technology is essential: these digital identifiers leverage secure elements within modern chipsets, supporting remote activation and multi-operator profiles without card swaps.
Understanding eSIM Transfer: Key Technical Foundations
Before diving into the transfer process, recognizing how eSIMs function on both platforms illuminates the technical pathway.Android devices typically support SRIM (SIM Registration Interface Message) protocols, built on GSMA standards, enabling user-defined eSIM provisioning through carrier apps or embedded menus. On iPhones, Apple introduced native eSIM support in iOS 14, streamlining activation but requiring carrier collaboration for initial setup.
/* **Core Differences in eSIM Handling:** - Android: Manages eSIMs via carrier digital provisioning profiles (DVPs); users add numbers via software image or NFC.
- iPhone: Requires carrier-issued eSIMs or dual-SIM configurations; activation limits to two physical SIMs or eSIMs in integrated embedded card slots. - Compatibility: iPhone eSIMs reside in a secure “Private Extension” chip; Android may use external or internal secure element depending on device model. - Remote provisioning: Both devices support remote eSIM activation, but iPhones rely more heavily on carrier services for instant setup.
*/ This distinction means transferring an eSIM from Android to iPhone isn’t a plug-and-play copy-paste—it demands compatibility checks and often carrier coordination. Nevertheless, Apple’s expansion of eSIM capabilities across recent iPhone models, combined with robust iOS integration, has narrowed the usability gap significantly.
Step-by-Step: Transferring Your eSIM from Android to iPhone
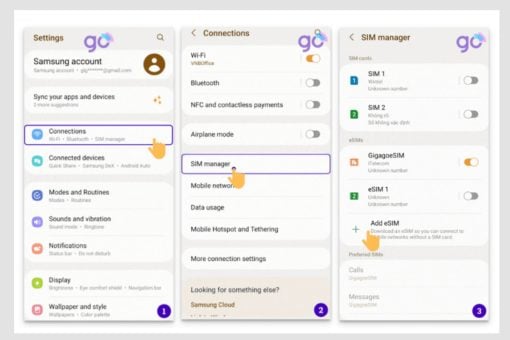
Successfully migrating an eSIM begins with verification and preparation.The process generally unfolds in several critical phases: identifying your eSIM details on Android, requesting its digital profile, and executing a secure transfer to your iPhone. Step 1: Extract eSIM Profile from Android Device Open your Android settings and navigate to Network & internet > SIM cards or eSIM settings. Locate your eSIM, tap to view details (including profile name, operator, and activation status).
Screenshot or export the configuration data—including the unique eSIM identifier—using Android’s built-in profile printer or carrier app tools. This data becomes essential for iPhone side. Step 2: Contact Carrier for eSIM Export or Ablation Not all telecom providers support eSIM export due to internal digital vault systems.
Contact your mobile carrier in advance to confirm if eSIM transfer is permitted. Some carriers require disabling the eSIM locally before exporting, while others pre-provision export bundles. Instructions vary: Verizon, for instance, instructs users to disable the eSIM in Settings Devices, followed by exporting via the cloud portal.
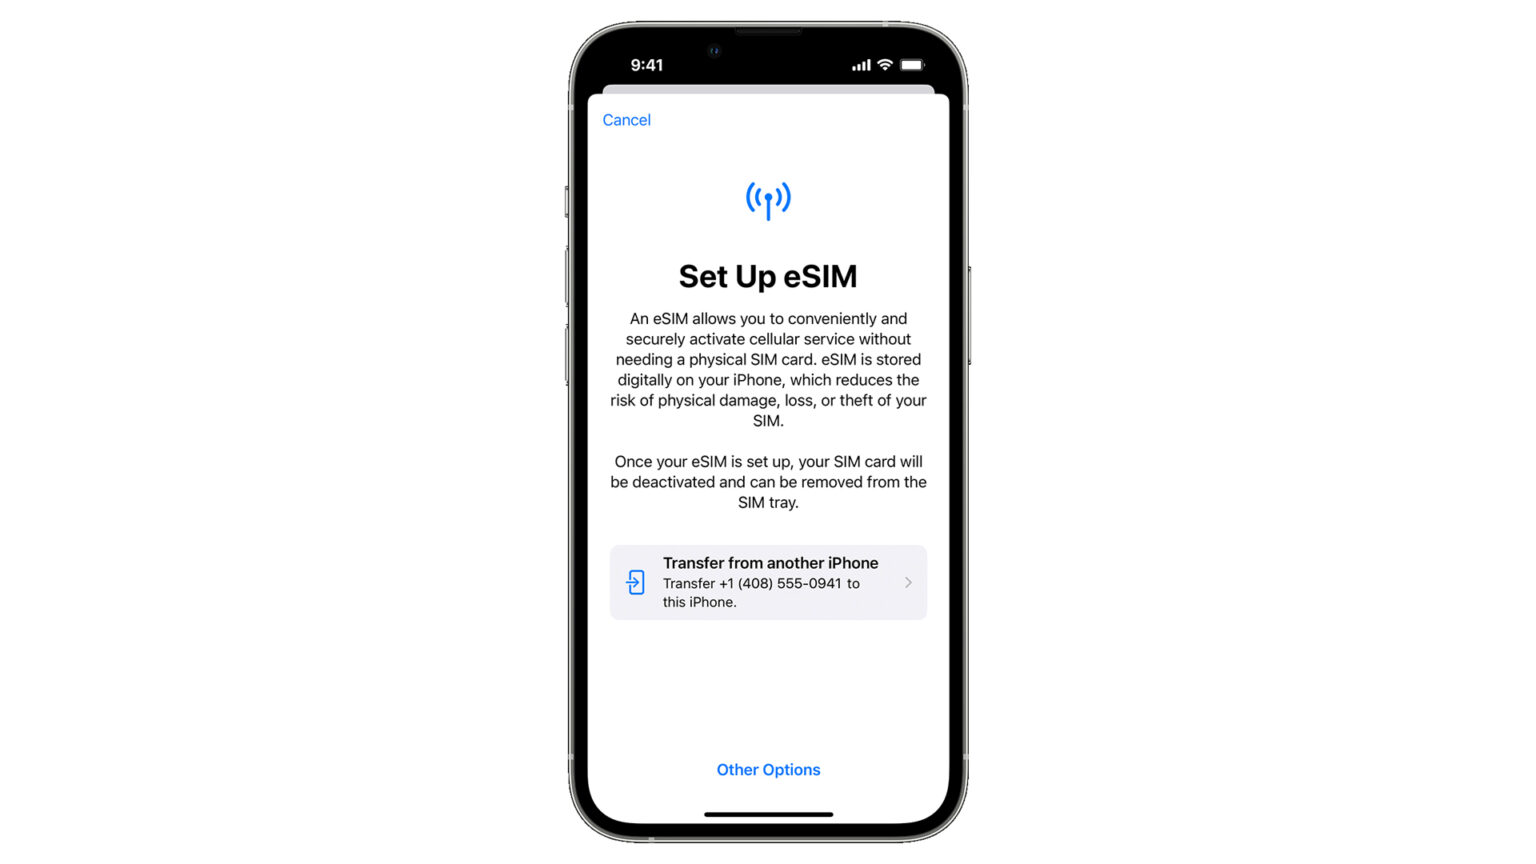
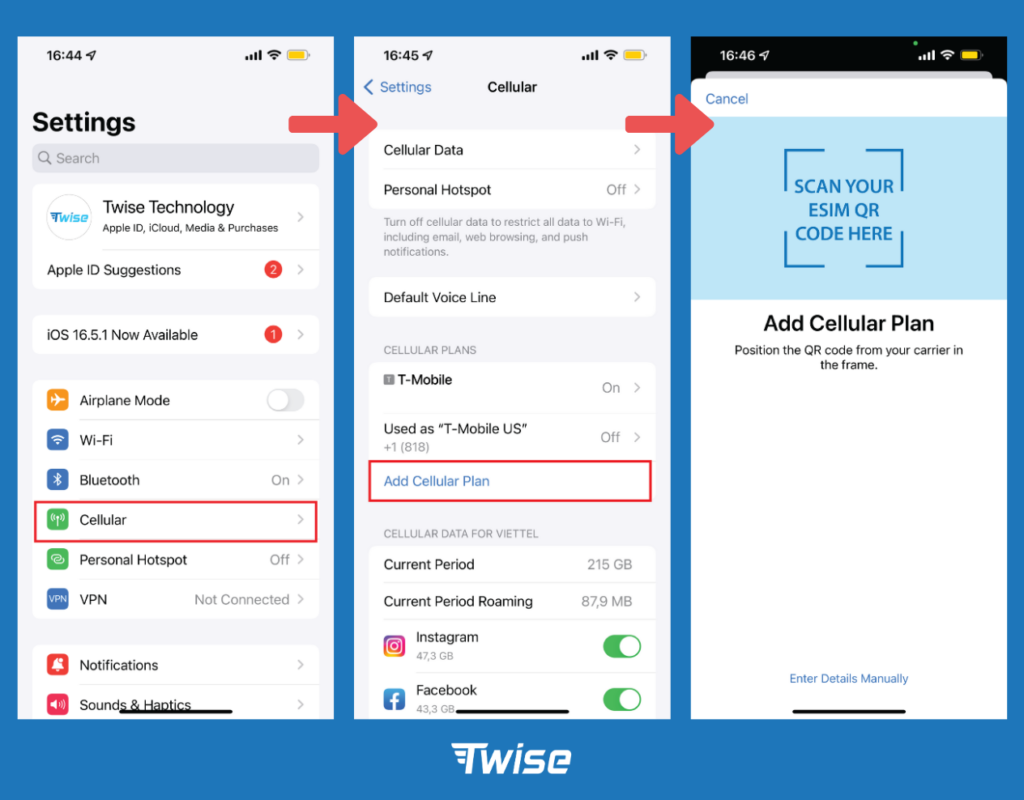
AT&T and others offer dedicated corporate accounts helplines for eSIM transitions. Step 3: Generate or Re-import eSIM Profile for iPhone On your iPhone, go to Settings > Cellular > Add Cellular Plan. Click “Add Plan” and manually enter the eSIM profile data—including the manufacturer identifier, security key, and service URL—provided by your carrier.
Apple automates most configuration, but when transferring from an Android eSIM, ensure the details match the original profile to avoid activation failures. Use the carrier’s official service URL (often https://exprofile.
Use Apple’s Mobile Data Health dashboard or a trusted eSIM verifier app to confirm signal strength and connectivity. If activation stalls, contact your carrier immediately—unresolved issues often stem from expired data plans or incompatible carrier policies.
For users whose Android eSIM was linked to a dual-SIM chip (e.g., in Samsung models), bypassing the device’s built-in eSIM support requires carrier collaboration to offload the profile, though Apple limits direct import from non-Apple systems—emphasizing the importance of carrier alignment.
Best Practices and Common Pitfalls
Maximizing success in eSIM transfer demands proactive planning.Key recommendations include: - **Pre-transfer Prep:** Identify your eSIM plan numbers and carrier details before starting. Document model-specific limitations—iPhone models vary in embedded eSIM hardware availability (e.g., iPhone 14 Pro supports dual eSIMs; older variants do not). - **Carrier Communication:** Confirm export procedures 3–5 days prior to transfer.
Delays often arise from internal system lockouts or policy restrictions. - **Security Watch:** Always use carrier-verified eSIM profiles. Avoid unofficial third-party transfer tools—risk of SIM swap fraud or profile theft.
- **Fallback Plan:** If iPhone setup fails, revert to temporary mobile hotspot or physical SIM as backup during transition. Major carriers like Verizon, AT&T, and Vodafone maintain dedicated eSIM support hotlines to assist with Android-to-iPhone migrations, reducing user uncertainty.
Final Thoughts: A Seamless Digital Transition
Transferring an eSIM from an Android to an iPhone, though technically nuanced, is increasingly streamlined thanks to carrier standardization and iOS enhancements.By preparing detailed profile data, coordinating with providers, and following precise setup steps, users can maintain uninterrupted connectivity across devices. As eSIM adoption grows, mastering this transfer process empowers travelers and digital nomads alike to enjoy global roaming freedom without the hassle of physical SIMs—proving that modern mobile identity is both secure and mobile-first.
In an era defined by digital convergence, understanding how to carry your connectivity—your eSIM—across operating system boundaries ensures continuity, convenience, and confidence in your mobile experience.
Related Post

Tomato Sauce Substitutes: Bold Flavors Without the Classic Crunch

Medalion Rahimis Husband: The Talented Actress Seen Through Her Personal Life

Mélanie Joly: Canada’s Bold Diplomat Reshaping Global Fashion and Strategy Far Beyond the Minerva Bench

The Sacrosanct Foundation: Preserving Integrity in an Age of Complexity